
Food holds memory.
Mine didn’t come from perfect kitchens or perfect timing. It came from a tiny San Francisco kitchen. A dull knife. Stubborn cabbage. And that quiet panic of trying to stretch what little we had without wasting a thing.
Our fridge couldn’t decide what it wanted to be. Too cold in the back. Too warm in the front. Greens wilted before we could get to them. Cabbage held on longer. Not forever. And I needed it to last.
At the same time, my body was doing its own version of “not forever.” A bi-coastal work schedule had me living on fractured sleep and whatever travel food was easiest. My digestion was… not thrilled. Irregularity became a constant companion, and I didn’t have the bandwidth to make it a full-time project.
Then I did what you did back then. I asked the internet.
Back when AOL dial-up was still a thing, three painfully loud minutes of page-loading later I landed on a strange little answer: salt + time + cabbage = something called fermentation. Thousands of years old. No powders. No fancy gear. Just a process nature already understands.
So I tried it.
My first kraut was shredded cabbage in an old pickle jar. The “weight” was a Ziploc bag filled with rocks. Very glamorous. Very San Francisco.
And when it started bubbling, I panicked. When I cracked the lid, the smell nearly knocked me flat. Pungent. Wild. Alive.
I tasted it anyway.
Because sometimes you’re not looking for a miracle. You’re just looking for any sign that real food can still do what it’s always done—preserve, nourish, steady you.
And that jar did. Not because I controlled it. But because I finally stopped trying to force everything—my schedule, my sleep, my digestion—and I let something living do its work.
That’s the thread I want to hand you here.
If I could make my first ferment in that tiny kitchen, with basic tools and a bag of rocks… you can absolutely make sauerkraut in yours.
So let’s do it together—simple, practical, and a little bit sacred.
What Lacto Fermentation Really Means
Lacto fermentation isn’t about adding something magical to your food.
It’s about making the conditions right—so the naturally occurring bacteria (especially Lactobacillus) can do what they already know how to do: turn the cabbage’s sugars into lactic acid.
That’s it.
No starter cultures. No special powders. No “gut protocol” required. Just salt, time, and the invisible intelligence living on the surface of your cabbage.
And that lactic acid? It does three beautiful, practical things:
- It preserves your vegetables (hello, food that actually lasts).
- It creates that tangy, bright flavor that wakes your mouth up.
- It makes the final kraut gentler to digest—the fiber softens, nutrients become more available, and the live cultures support the ecosystem you’re already carrying around.
This isn’t a supplement pretending to be food.
It’s food—remembering how to be food.
Why Start with Sauerkraut?
Because it's almost impossible to mess up.
Cabbage is forgiving. It releases its own brine when you massage it with salt, so you don't need to worry about ratios or measurements with the precision of a chemistry lab. It ferments reliably at room temperature. And if something goes wrong: which is rare: you'll know. Trust your nose. Trust your eyes.
Sauerkraut also doesn't require special equipment. No airlocks, no fermentation crocks, no weighted stones (though they help). Just a jar, your hands, and a willingness to let go.
It's the perfect introduction to a way of eating that honors the body's rhythm instead of fighting it.
What You'll Need
Ingredients:
- 2 pounds of cabbage (green or red: organic if possible)
- 4 teaspoons of sea salt or kosher salt (no iodine, no anti-caking agents)
Equipment:
- Large mixing bowl
- Sharp knife or mandoline
- Clean glass jar (quart-sized or larger)
- Something to keep the cabbage submerged: a smaller jar filled with water, a fermentation weight, or even a reserved cabbage leaf
That's it. Nothing fancy. Nothing expensive.
The Process
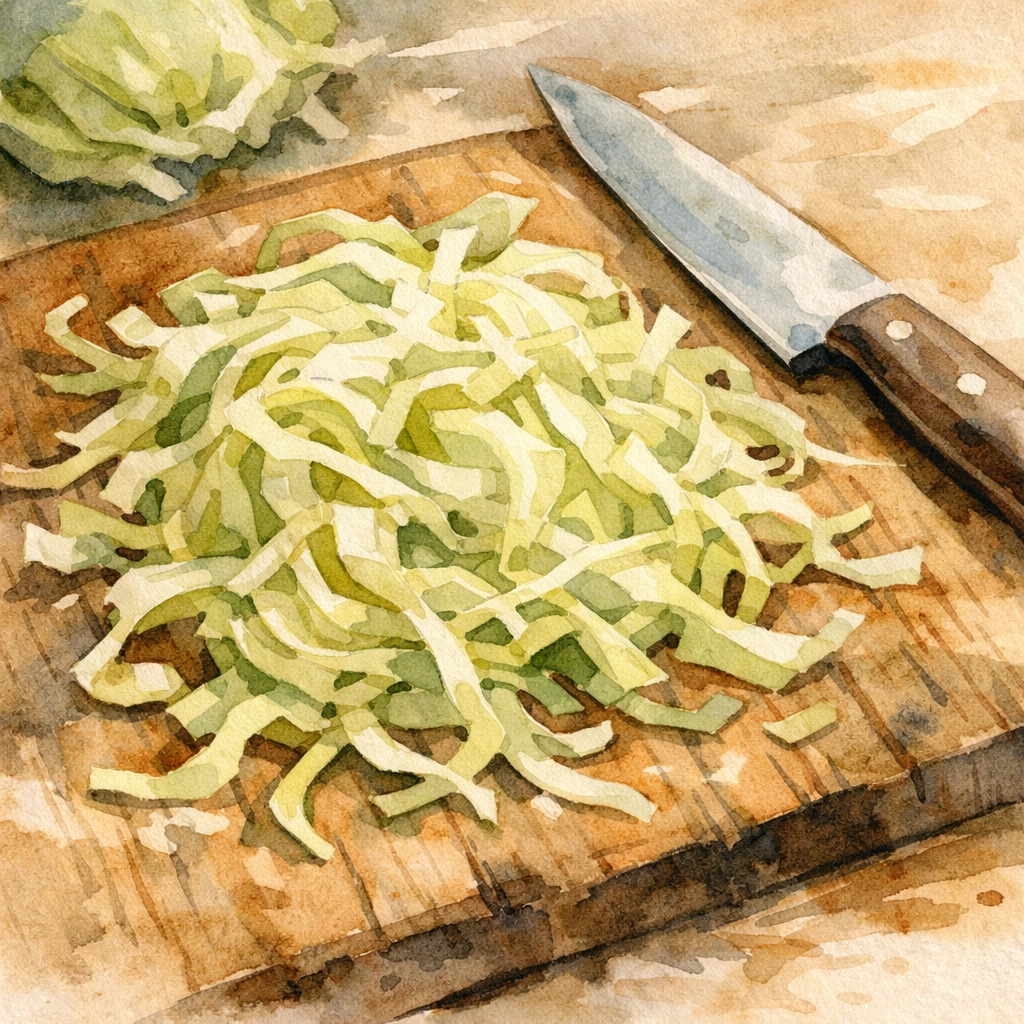
Step 1: Prepare the Cabbage
First—save a leaf or two from the outside. Just peel them off and set them aside. They’ll come back in the story later.
Then cut the cabbage into quarters, slice out the core, and shred it thin. Really thin if you can. (This is where I think about that dull knife in San Francisco and laugh. You don’t need fancy. You just need “good enough.”)
The thinner the ribbons, the easier it is for the cabbage to give up its liquid.
And if your cuts are uneven? Congrats—you’re fermenting like a real person. It’ll still work.
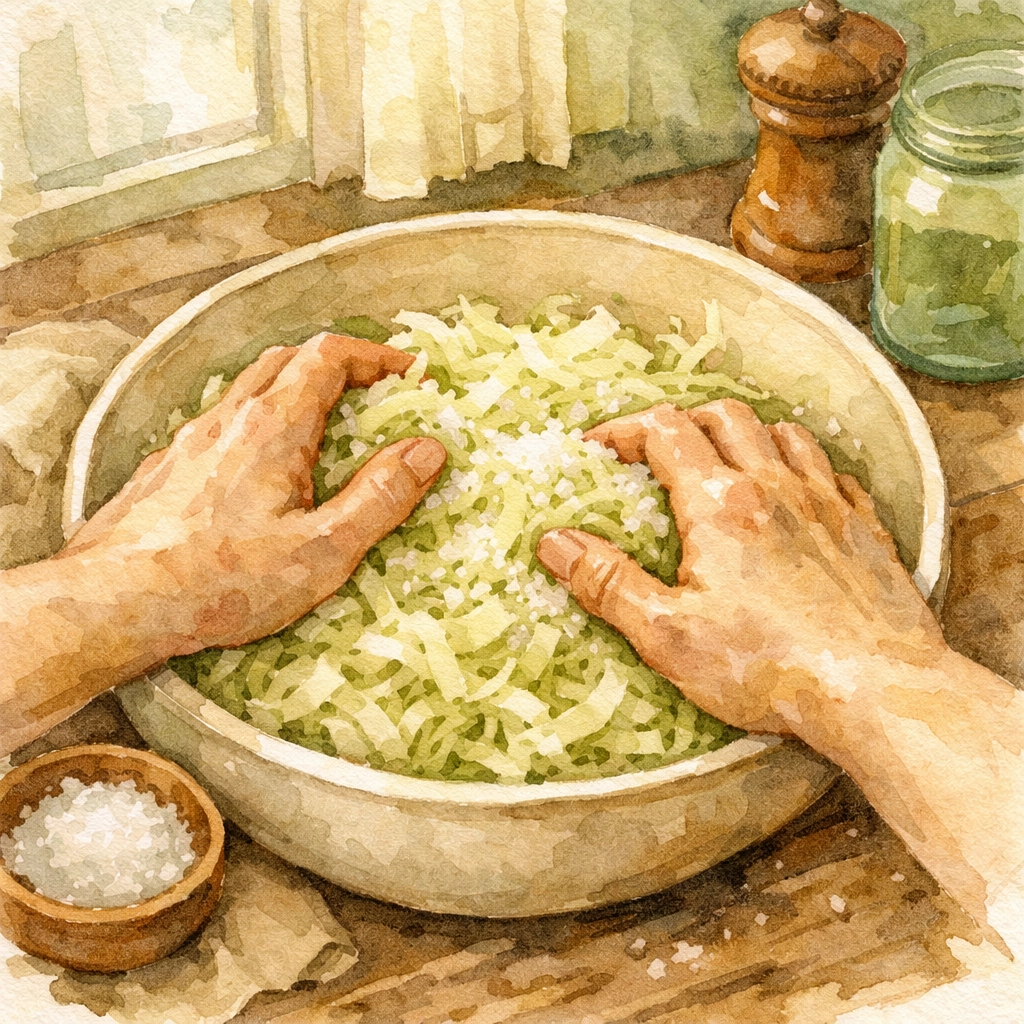
Step 2: Salt and Massage
Put your shredded cabbage in a big bowl. Sprinkle the salt over it—about 2 teaspoons per pound of cabbage.
Then use your hands. Toss it around. And start massaging like you mean it.
Squeeze. Press. Knead.
At first it feels like… nothing is happening. And then it shifts. The cabbage softens. The smell changes. Liquid starts pooling in the bottom of the bowl.
That’s the moment I love most—because it’s proof you don’t need to add a bunch of extras. The cabbage has what it needs. You’re just helping it get there.
Let it rest for 10–15 minutes. Then come back and massage again.
By the end, your cabbage should look wilted and glossy, and you should have a nice puddle of brine underneath.
This part takes a little patience. But it’s the good kind—the kind that teaches your nervous system to slow down while your food wakes up.
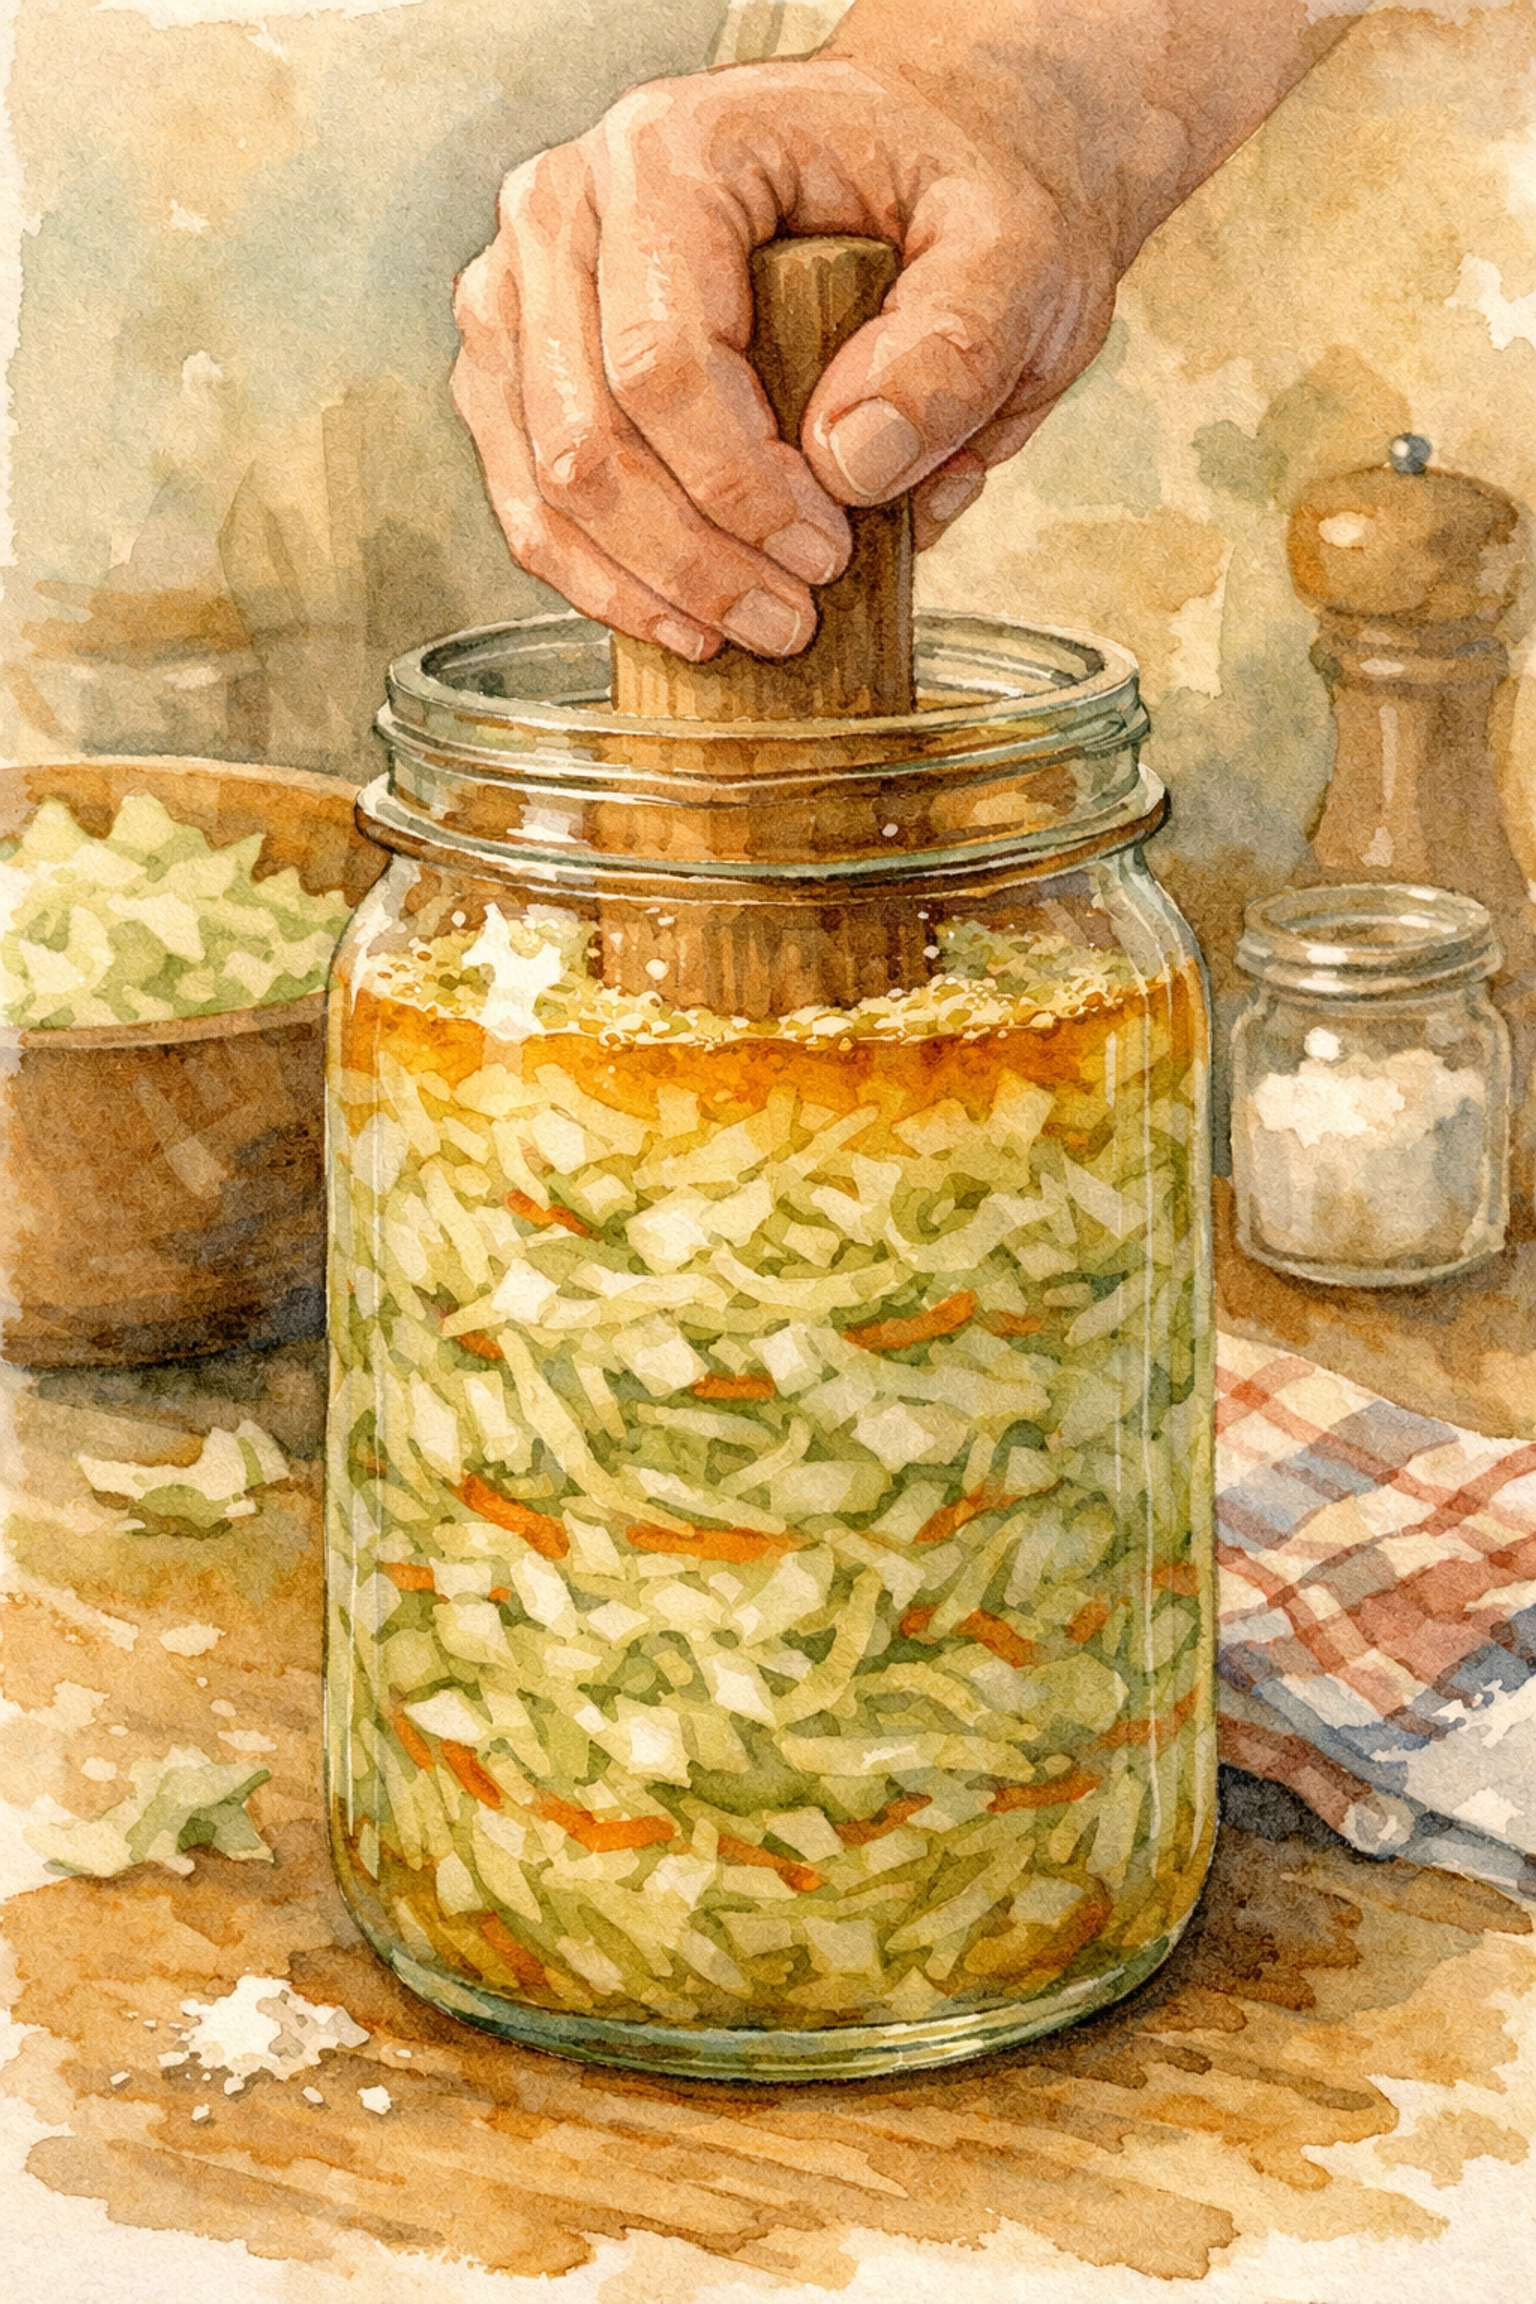
Step 3: Pack the Jar
Now scoop the cabbage into your clean jar—and pour in every drop of brine. Don’t leave the good stuff behind.
Press it down firmly as you go. You’re trying to:
- knock out air pockets
- bring the brine up and over the cabbage
Use your fist. Use the back of a spoon. Use a “kraut pounder” if you have one.
And if you’re like I was—working with whatever’s on hand—just know: “imperfect tools” are still tools.
If the brine doesn’t rise above the cabbage, you’ve got two options:
- Keep pressing and give it a few minutes (sometimes it just needs time).
- Make a quick brine: dissolve 1 teaspoon salt in 1 cup water, then add just enough to cover.
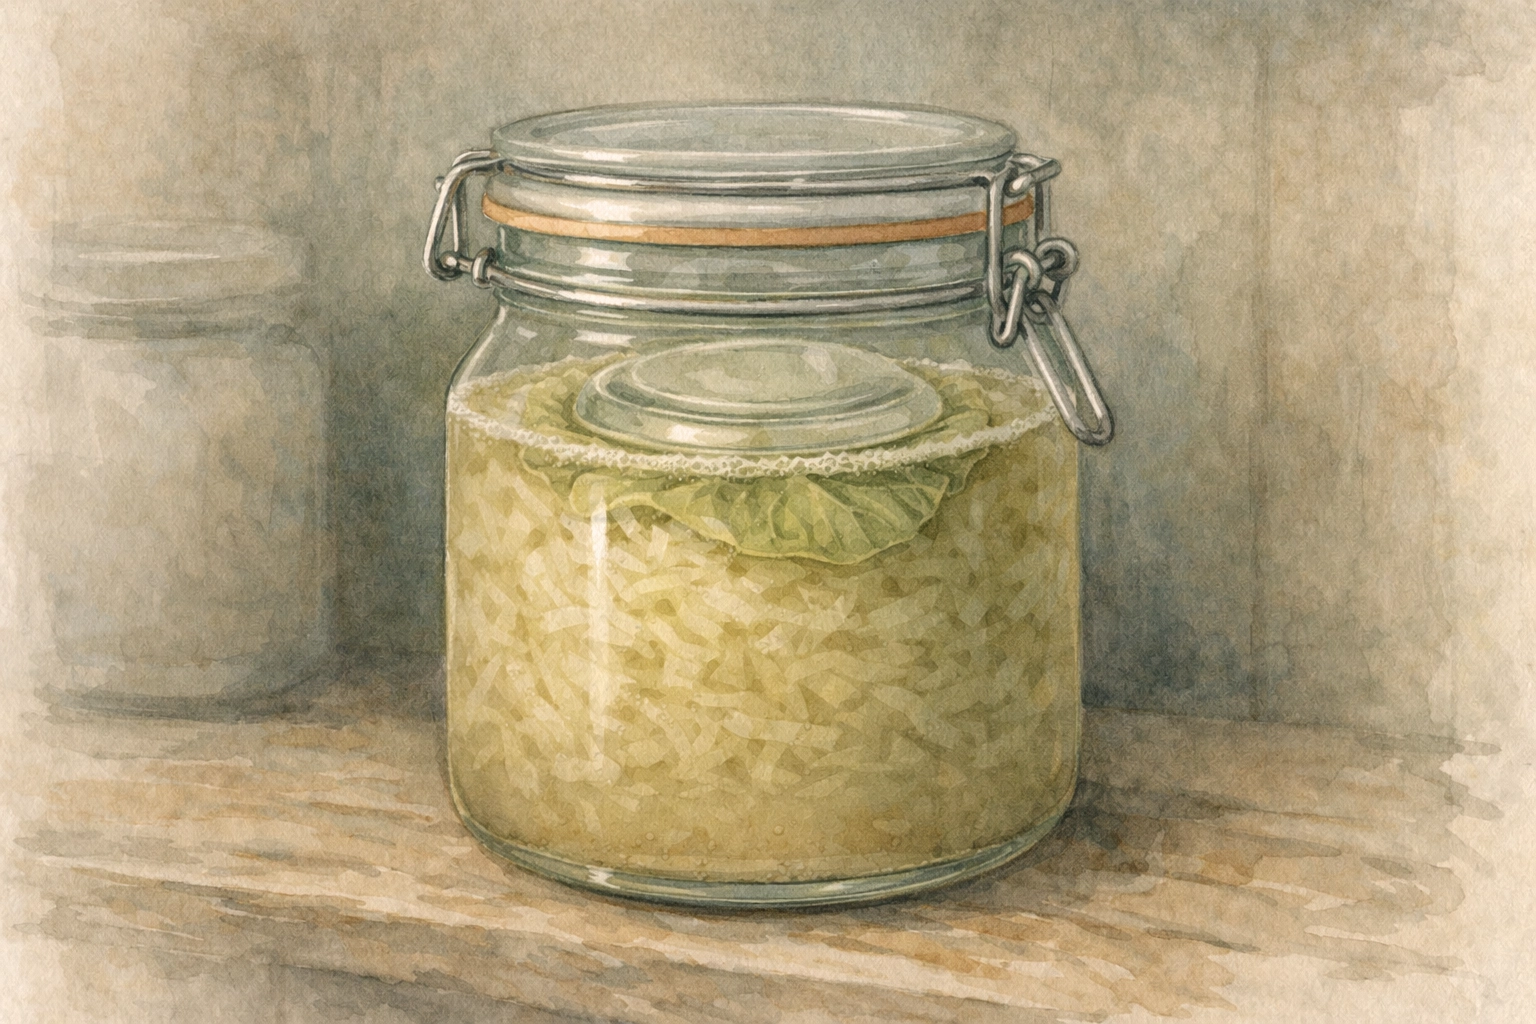
Remember those reserved cabbage leaves? Lay one on top like a little lid. It helps keep shreds from floating up.
Then add a weight—because cabbage likes to wander.
A fermentation weight is great. A smaller jar filled with water works too.
And yes, my first weight was a Ziploc bag filled with rocks. I’m not saying you should do that… I’m just saying it worked.
The point is simple: keep the cabbage below the brine line. Air is where mold likes to get ideas.
Step 4: Ferment
Cover your jar. If you have an airlock lid, great. If not, use a regular lid loosely screwed on or a cloth secured with a rubber band. The cabbage needs to breathe: carbon dioxide will build up as fermentation happens.
Set the jar somewhere cool and dark. A cupboard works. So does a countertop away from direct sunlight. Ideal temperature is between 65-70°F, but don't stress if your kitchen runs warmer or cooler. Fermentation will just happen faster or slower.
Now comes the hardest part: waiting.
What to Expect
Within 24 hours, you'll start seeing bubbles. This is good. This means the lactobacillus is active, converting sugars and creating that tangy flavor.
The brine may turn cloudy. Also normal. You might see white film on the surface: that's kahm yeast, harmless but not delicious. Just skim it off.
After about 3-5 days, taste it. Use a clean fork to fish out a small piece. Does it taste pleasantly sour? Is the texture softer than raw cabbage but still has some crunch? Then it's ready: or close.
Most people find their sweet spot around day 7. But this isn't a rule. It's a relationship. Some like it mild and barely fermented. Others prefer it mouth-puckeringly sour after two weeks.
You decide when it's done.
Once you're happy with the flavor, seal the jar with a regular lid and move it to the refrigerator. Cold temperatures slow fermentation to a crawl, preserving your sauerkraut for months.
Why This Matters for Your Gut
Sauerkraut isn't a quick fix for digestive problems. It won't "heal your gut" in seven days or rebalance your microbiome overnight.
But it does something more important: it introduces your body to the rhythm of fermentation. To fiber that's been pre-digested by bacteria. To live cultures that support the ecosystem already living inside you.
Your gut isn't a broken machine that needs fixing. It's an intelligent system that responds to what you feed it: not just nutritionally, but relationally. When you eat fermented foods regularly, you're teaching your body to work with bacteria instead of against them.
This is the food-first approach. Not supplements. Not protocols. Just real food doing what it's always done.
What Happens Next
Once you’ve made your first batch of sauerkraut, you’ll realize something: fermentation isn’t complicated. It’s just unfamiliar.
And once it’s familiar? It becomes part of your rhythm.
You might add caraway next time. Or garlic. Or mix red and green cabbage just because it’s pretty. You might move on to kimchi, fermented pickles, or water kefir.
Or you might keep making this exact recipe on repeat—because it works, and your gut quietly thanks you.
Either way, you’ve stepped into a practice that’s older than cookbooks. Older than nutrition trends. A practice that treats the body not as a problem to solve, but as a system to support.
Start with two pounds of cabbage and four teaspoons of salt. See what happens when you stop controlling and start trusting.
The bacteria know what to do. They always have.
Ready to Go Deeper? Grab the Deluxe Preorder Bundle (Book + Field Kit + Club Access)
If your first ferment makes you curious—good. That curiosity is part of the point.
The Deluxe Preorder Bundle is for the person who wants the “why” and the hands-on practice: real-food context, gentle fermentation projects, and a place to keep learning without getting pulled into quick-fix culture.
- The Book — story, science, and the kind of guidance you can actually live with
- The Field Kit — tools + support for getting your ferments going at home
- Club Access — a community rhythm (because doing this alone can feel weird at first)
Get the bundle here: https://thegutsoffermentation.com/products/the-guts-of-fermentation%E2%84%A2-hardcover-edition-copy
Want a Little Structure Each Month? Try the Monthly Fermentation Kit
If you’re the kind of person who loves a nudge—and you want fermentation to become normal food, not a “special project”—this is for you.
The Monthly Fermentation Kit keeps it simple and steady. One project at a time. Ingredients and guidance that make it feel like a friend texting you: “Hey, want to start a jar this week?”
Sign up here: https://thegutsoffermentation.com/products/monthly-fermentation-kit